Welcome to the Less Meeting walkthroughs. These articles will help you explore Less Meeting's finer details.
So you've synced your calendars and added your meetings to Less Meeting and now you're ready to figure out all the bonus features that come with Less Meeting's Outlook plugin.
This article covers the following features:
Create a New Meeting
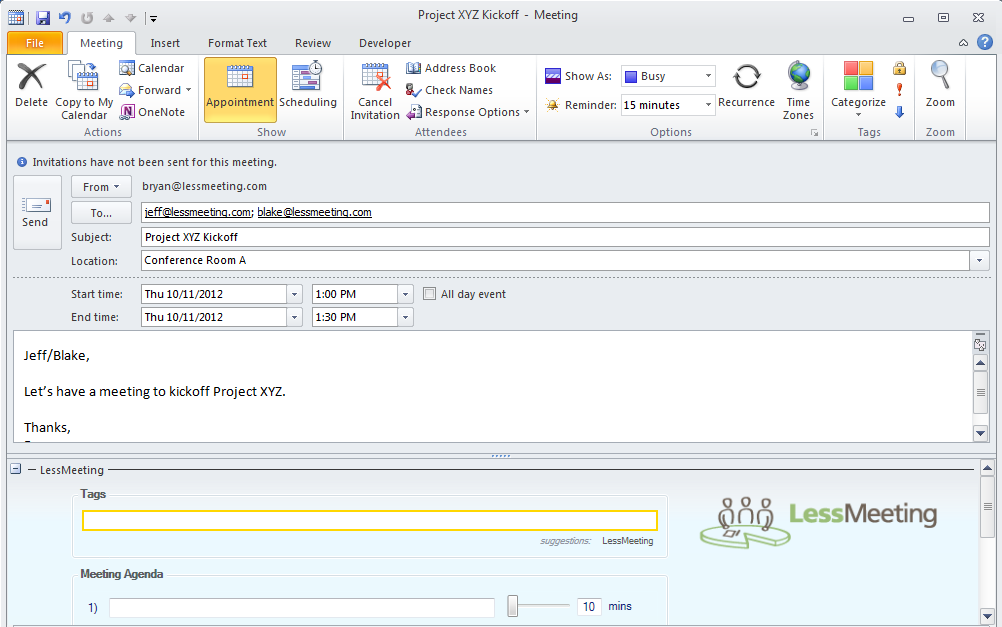
From your Outlook calendar, click the New Appointment button to start creating a new meeting.
After you've added your regular meeting details (Subject, Location, Attendees, etc), find the Less Meeting section at the bottom of the invite.
Add Items to the Agenda
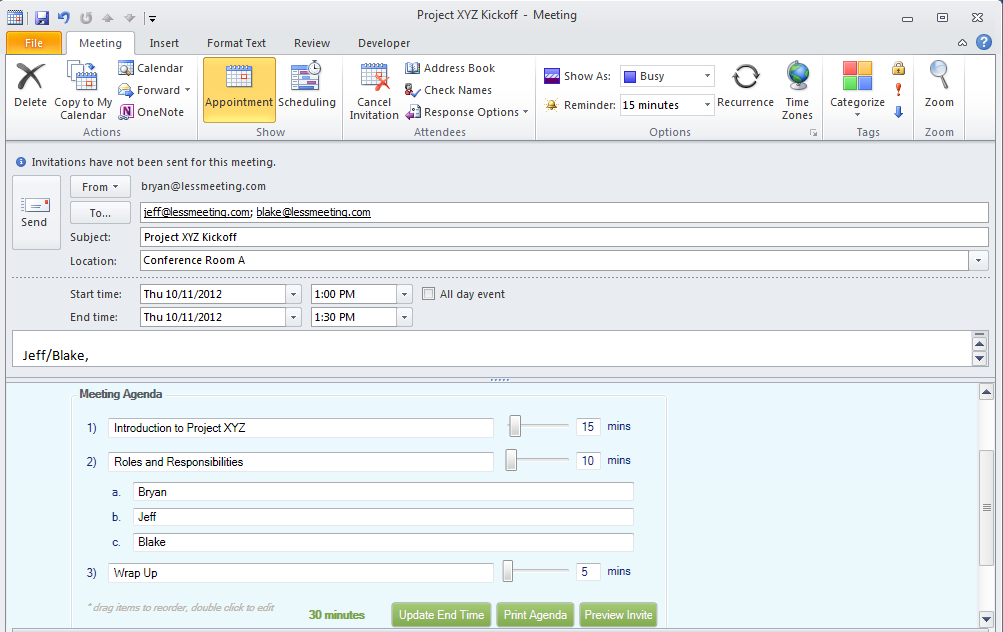
Agenda items allow you to structure the meeting by specifying topics that will be covered in a certain order for a certain amount of time.
To add items to the Agenda click on the Agenda textbox and type in the first item, pressing enter to save. You can set the time for each agenda item by changing the slider to the right or typing the time into the textbox. Continue with this process until all agenda items are added.
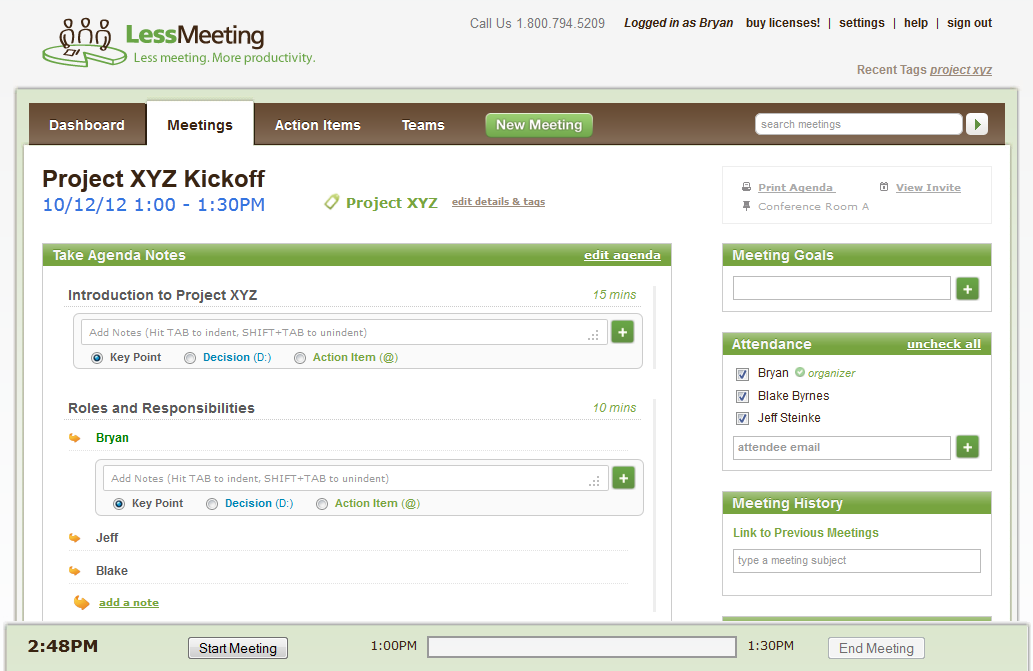
Sub-agenda items can also be added below each agenda item. In the screenshot above, sub-agenda items have been added under the "Roles and Responsibilities" agenda for "Bryan", 'Jeff", and "Blake".
The agenda order can be modified by dragging and dropping the numbers and letters.
To delete an agenda item, hover over it and click the "X" button on the right side.
As agenda items are being added, the total time is display at the bottom of the Agenda section. If the time exceeds the total time scheduled for the meeting, the number will turn red.
The "Update End Time" button exists to change the meeting end time based on the total minutes allocated in the agenda. For example, if the meeting is originally setup for 2:00pm – 2:30pm and the agenda has 4 items totaling one hour, clicking the Update End Time button will change the meeting time to 2:00pm – 3:00pm.
Tags are used to specify the subject matter of the meeting. Think of them as labels or folders.
They're used when searching for meetings as well as setting up Teams to share meeting info with the rest of the Less Meeting users at your organization.
A tag can be added by typing in the Tags textbox. More than one tag can be added and tags should be separated by a comma.
Tags can be individual words or phrases. For example, a tag for a weekly status meeting about tracking projects in the IT department could be: Status Meeting, IT.
Print Agenda
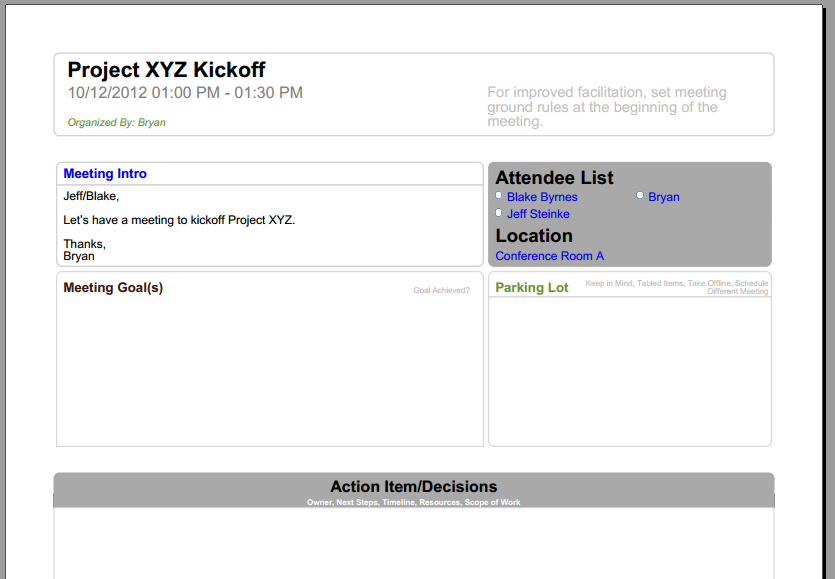
Clicking the Print Agenda button will generate a PDF file with all of the meeting information.
This is useful if you cannot bring your computer to the meeting or do not have internet access to take meeting notes online.
Preview Invite
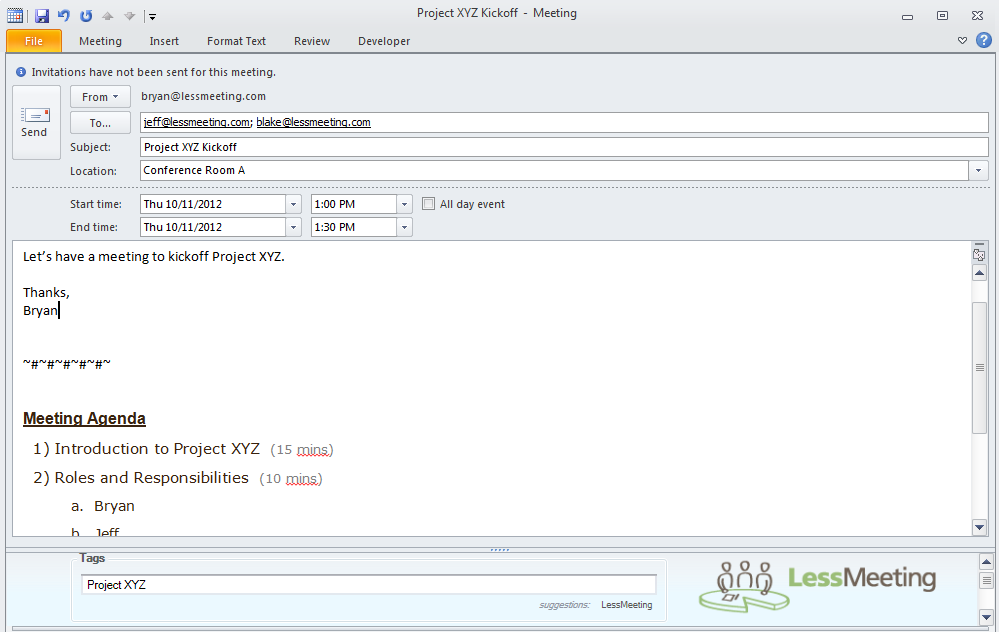
Clicking the Preview Invite button adds the Agenda and Tags to the bottom of the meeting body so that you can preview it before it's sent out to attendees, including those that don't have Less Meeting.
Note: This text will automatically generate when the meeting is sent, even if the Preview Meeting is not clicked.
Send Meeting
When you send the meeting invite it'll automatically sync to Less Meeting and add a new meeting page.
Find your meeting from the Less Meeting dashboard or meetings page. An Outlook reminder will also appear around 5 minutes before the meeting starts if you have a reminder set to go off at that time.
Making Changes to the Meeting
When you make changes to the attendees, time, location, agenda, or tags for a meeting those changes will automatically update in Less Meeting.
This will be done when the calendar invite is saved in Outlook or the update is sent out to the participants.
Meetings Sent from Others
Meetings you receive from non-Less Meeting users will also automatically sync to Less Meeting.
You will need to add an agenda and tags to the meeting, which can be done through the meeting webpage.
Recurring Meetings
Recurring meetings, or series (e.g. your weekly team status call) will share the same agenda and tags across all meetings in the series. As you update the agenda, all future meetings in the series will also update.
Additionally, any action items assigned in a previous meeting will appear at the bottom of the meeting page in the Action Items section, making it easy to see which action items from last week's meeting still need to be finished.

